How to Install ReConvert and Automate Birthday SMS in Shopify
How to Install ReConvert and Automate Birthday SMS in Shopify
Article Summary
Share feedback
Thanks for sharing your feedback!
Celebrate your customers’ birthdays together and make them feel special by sending them a thoughtful text message with a discount code they can use on their purchase.
Integrating ReConvert with Yotpo SMS & Email, you can create beautiful thank you forms with a birthday collector widget that collects customer birthdays at checkout, and then send an SMS automation on their special day.
This post will guide you through the installation process as well as how to create the birthday widget in ReConvert and send a birthday automation in Yotpo SMS & Email.
Installing ReConvert
Follow the steps below for a quick and easy installation, so you can start sending customers SMS birthday discounts in no time.
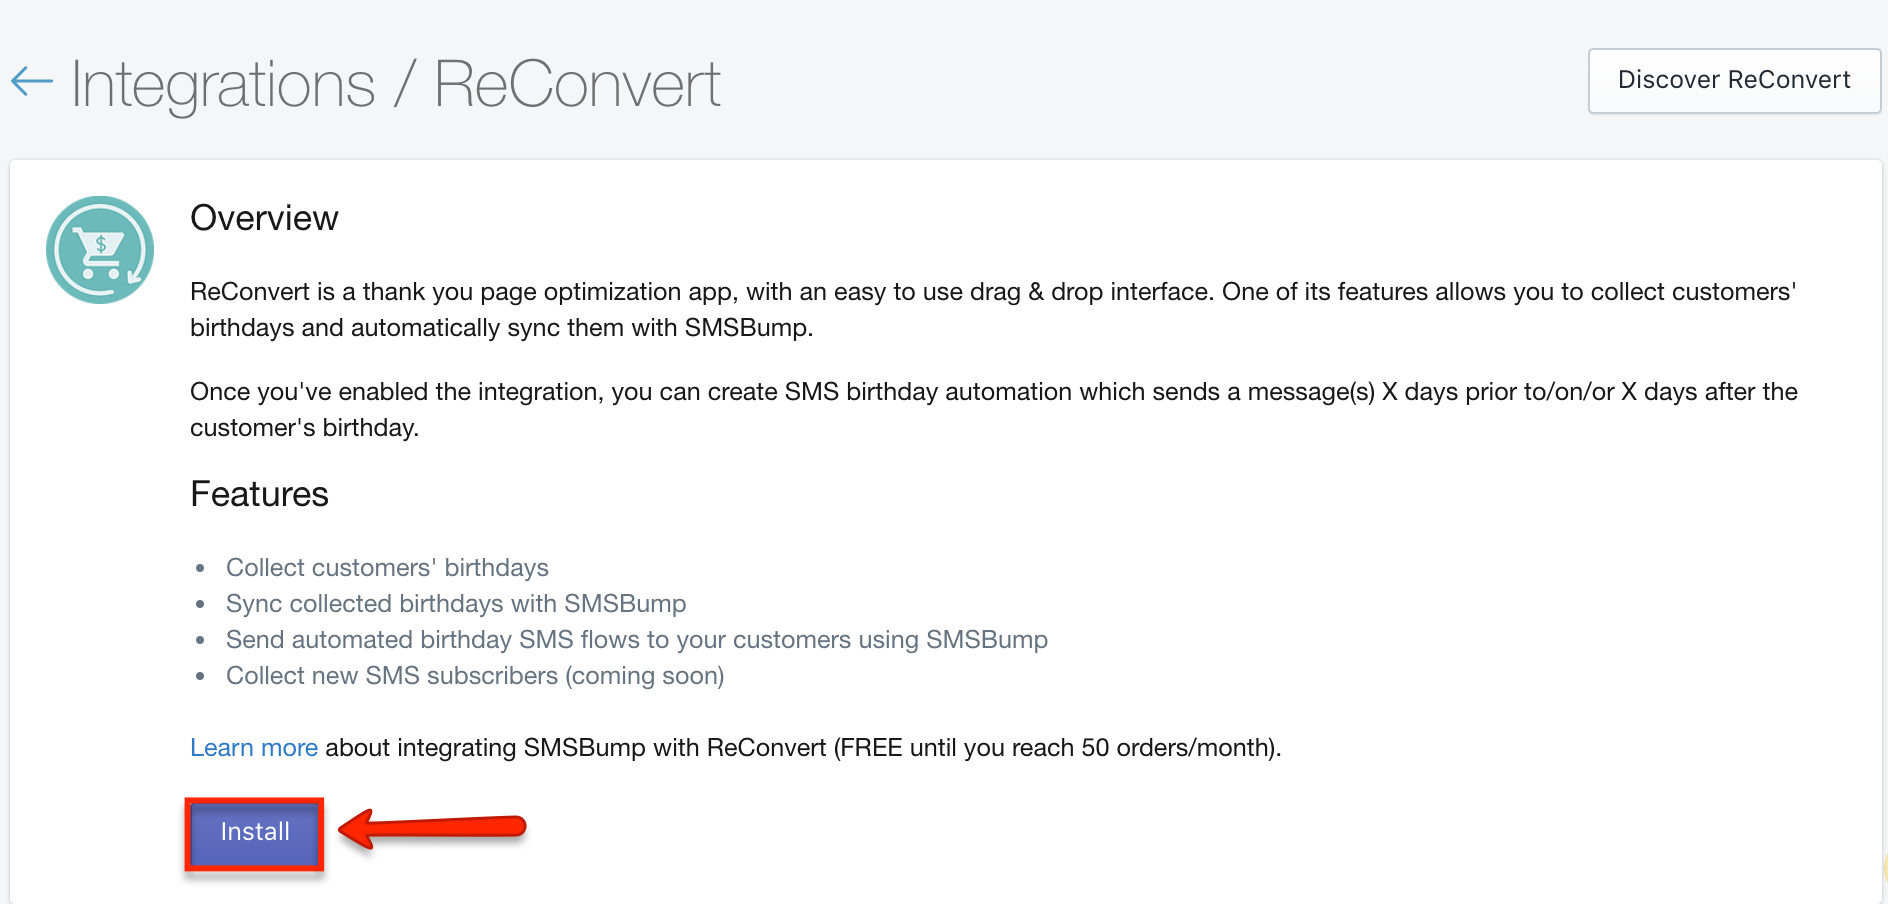
- From the Integrations section in the Yotpo SMS & Email app, select ReConvert. Click on the Install button.
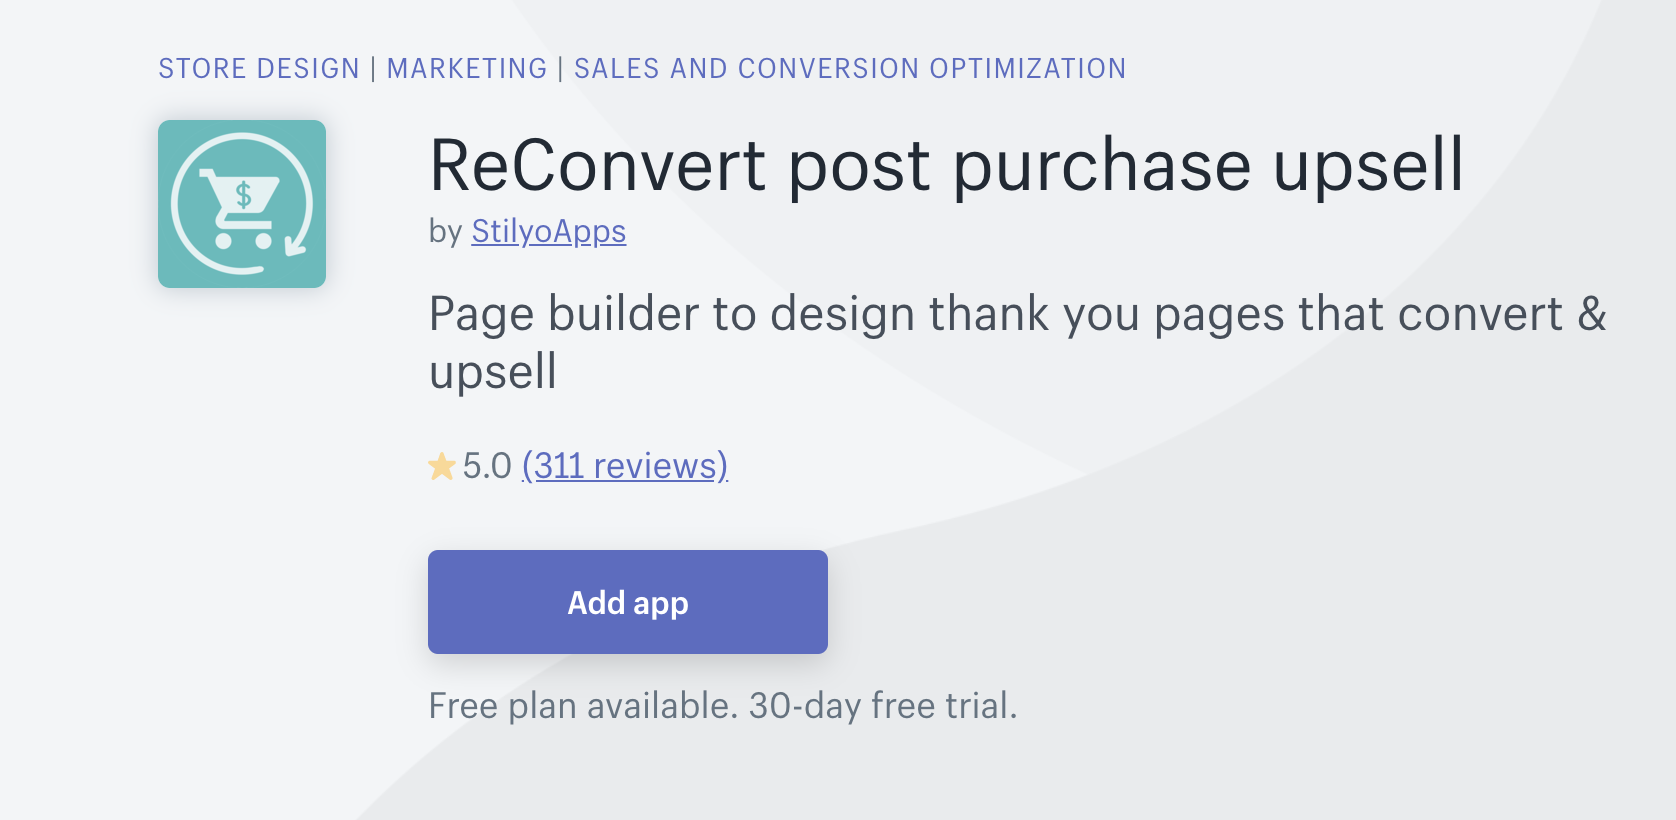
- You will be redirected to ReConvert in the Shopify app store page. Click on Add app.
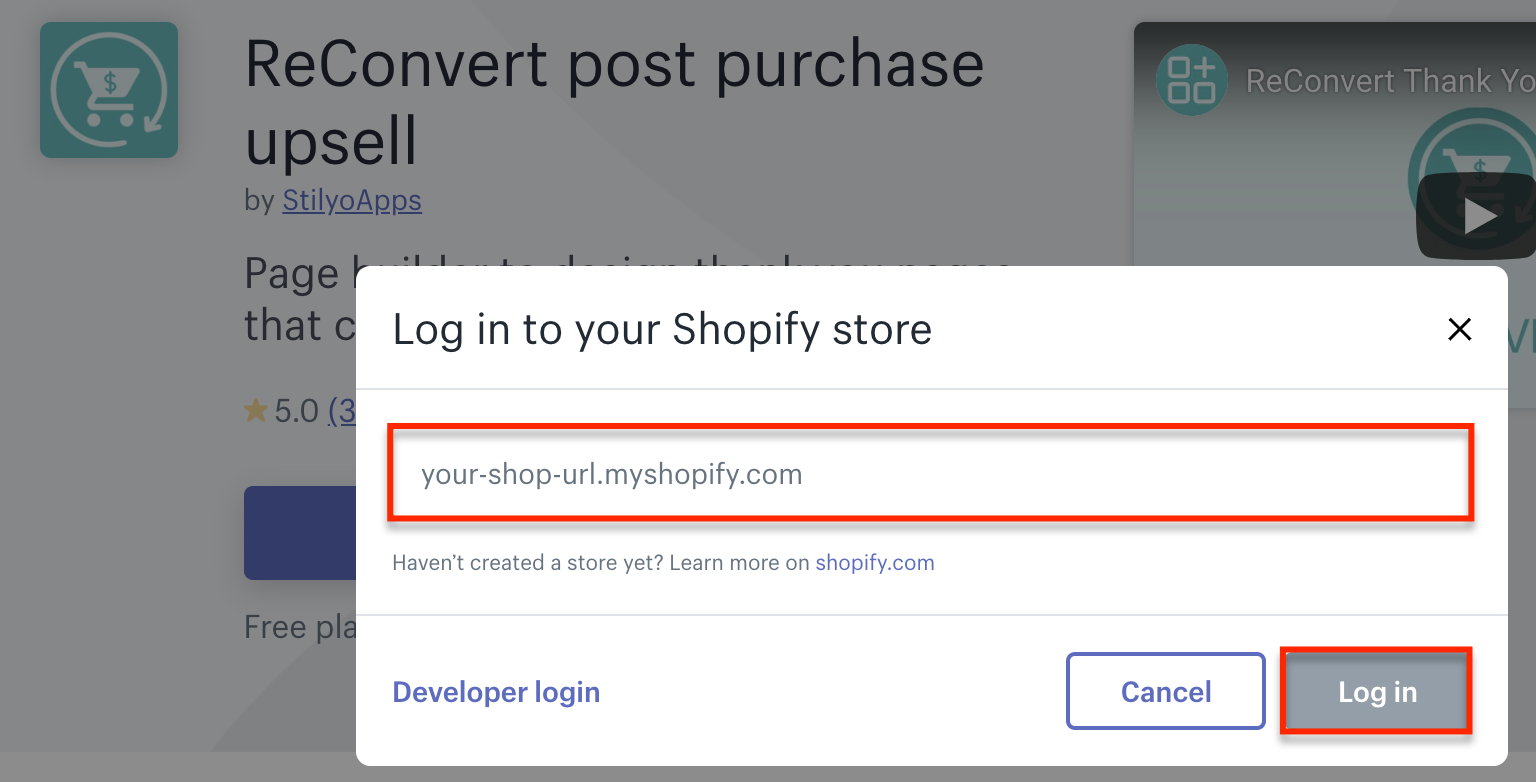
- Type in your Shopify store URL and click on Log in.
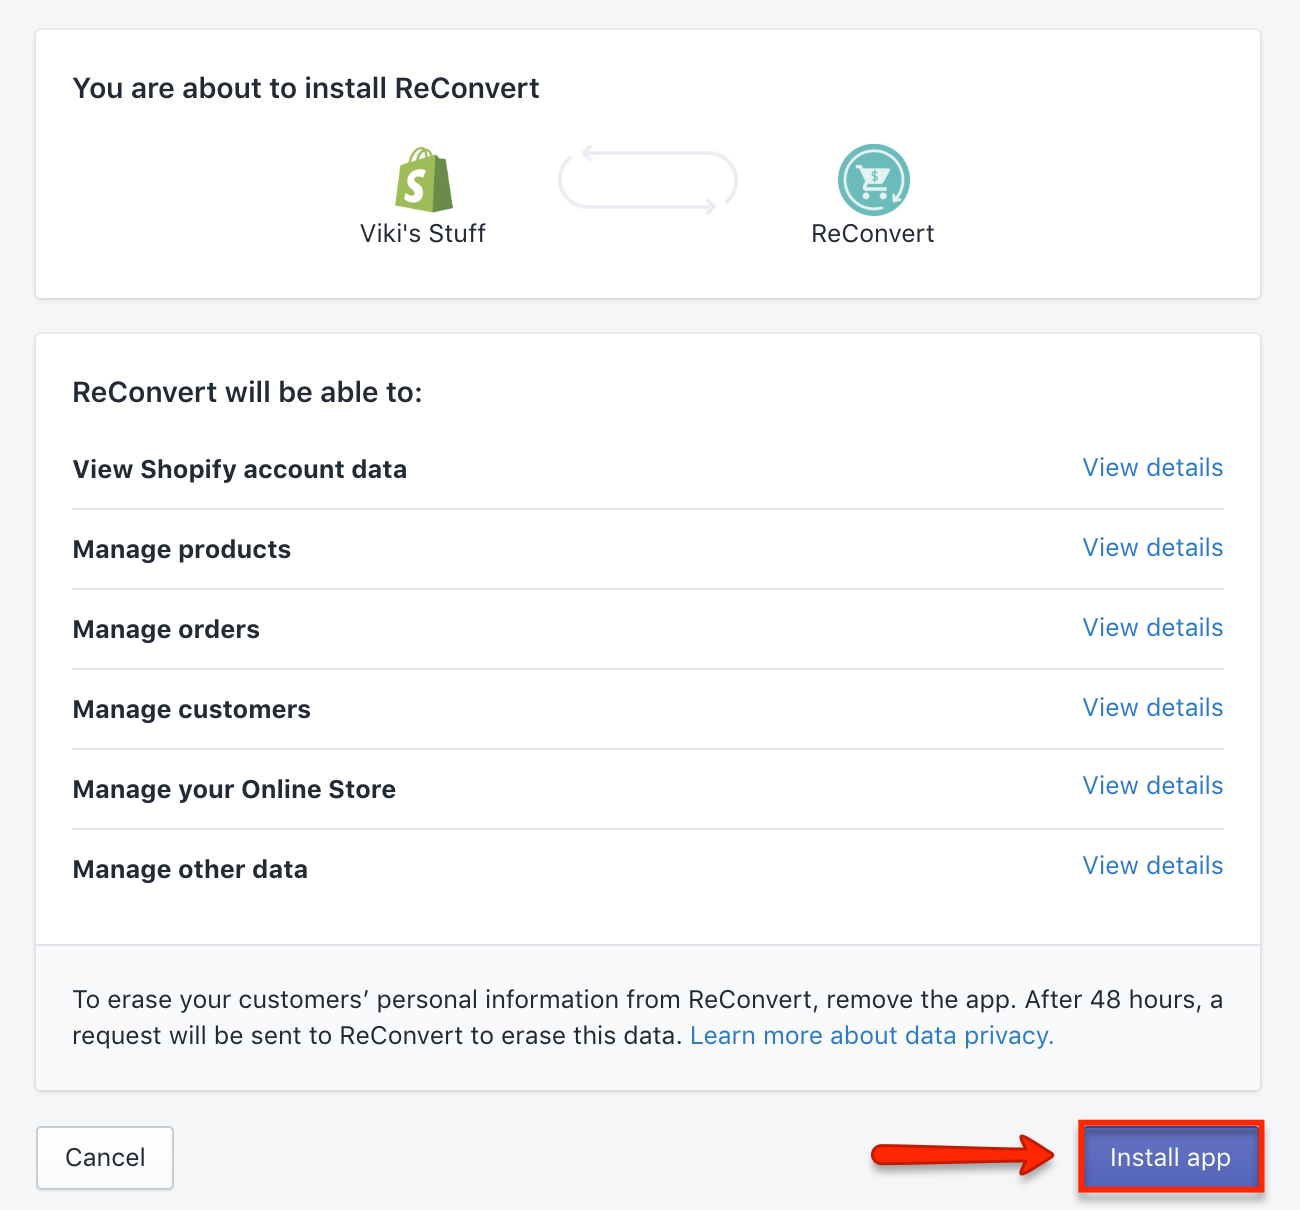
- Read over the fine print detailing the access you will grant ReConvert, and click on Install app.
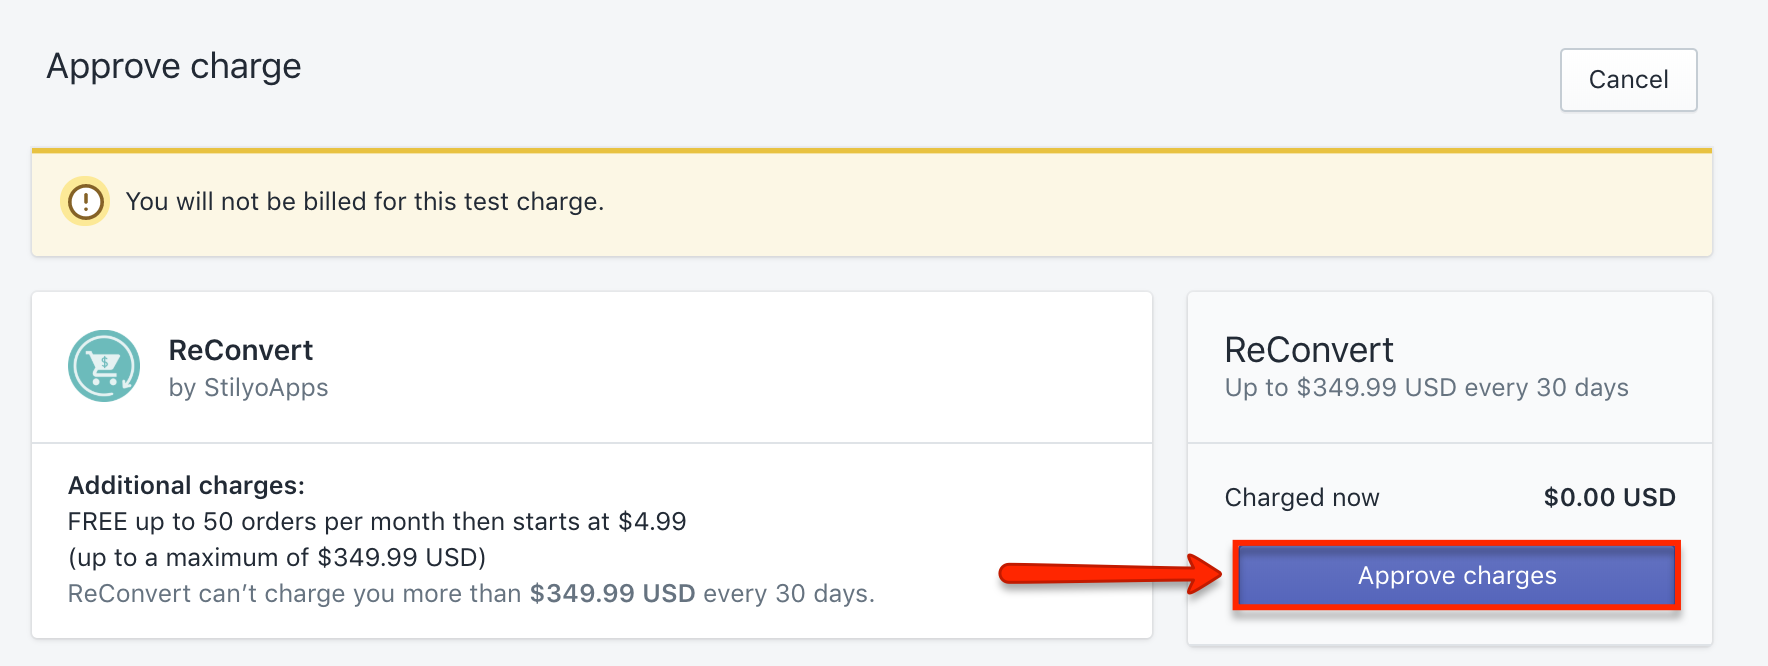
- Read over the additional charges applied, and click on Approve charges. (You won’t be billed for the initial test charge). Once the charge is approved, you’ll be redirected to the template creation section.


Creating a new template
After successfully installing ReConvert in Yotpo SMS & Email, you are ready to create your first birthday collection form.
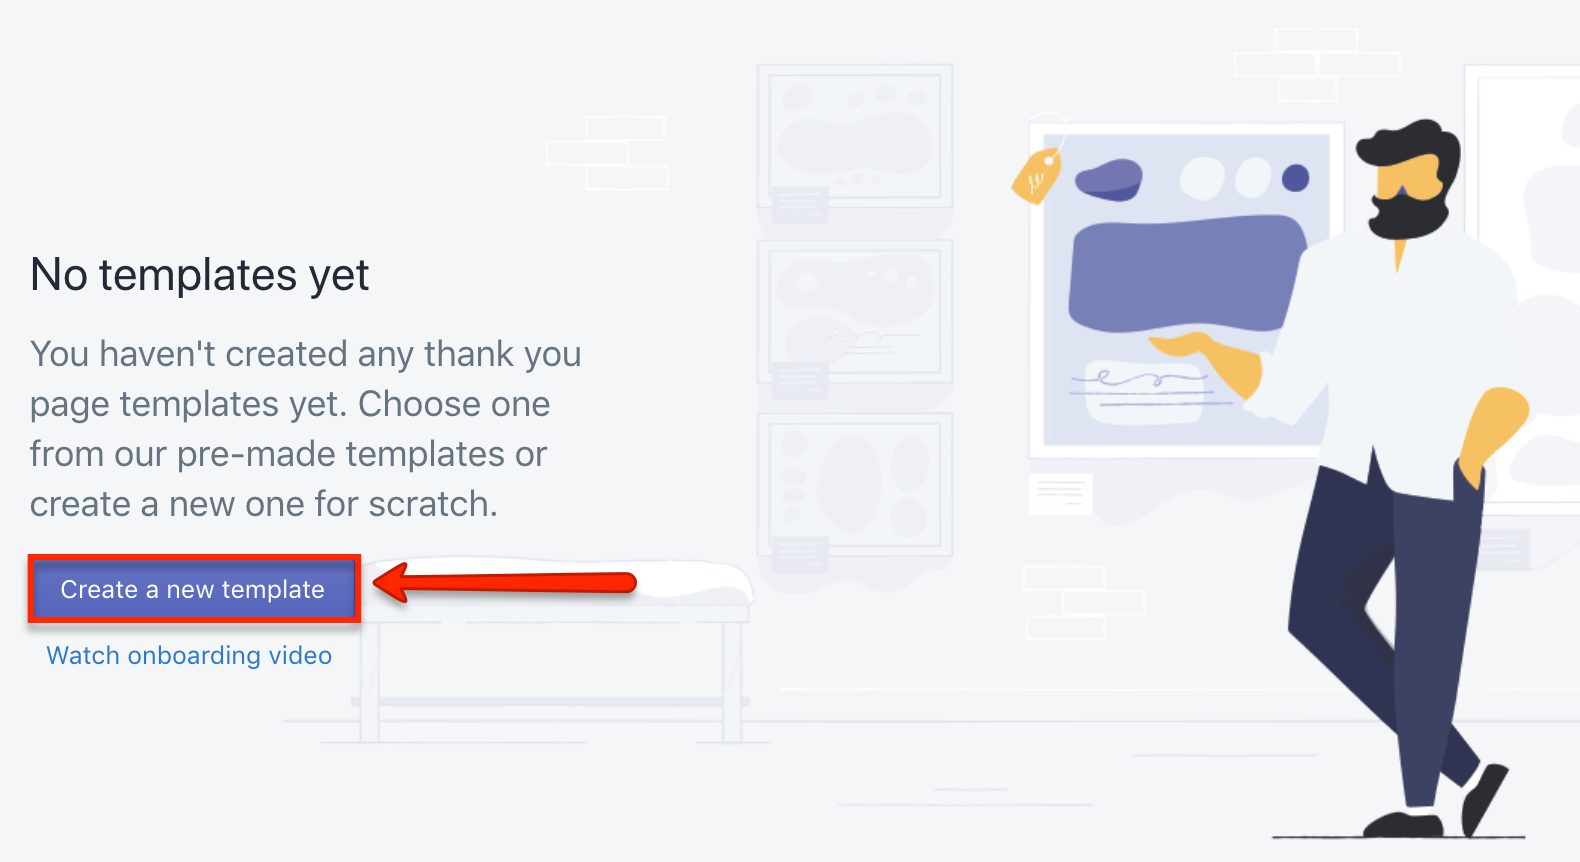
- If you haven’t already been redirected to the template creation page after installation, navigate to Apps from the Shopify side menu and select ReConvert. Click on Create a new template.
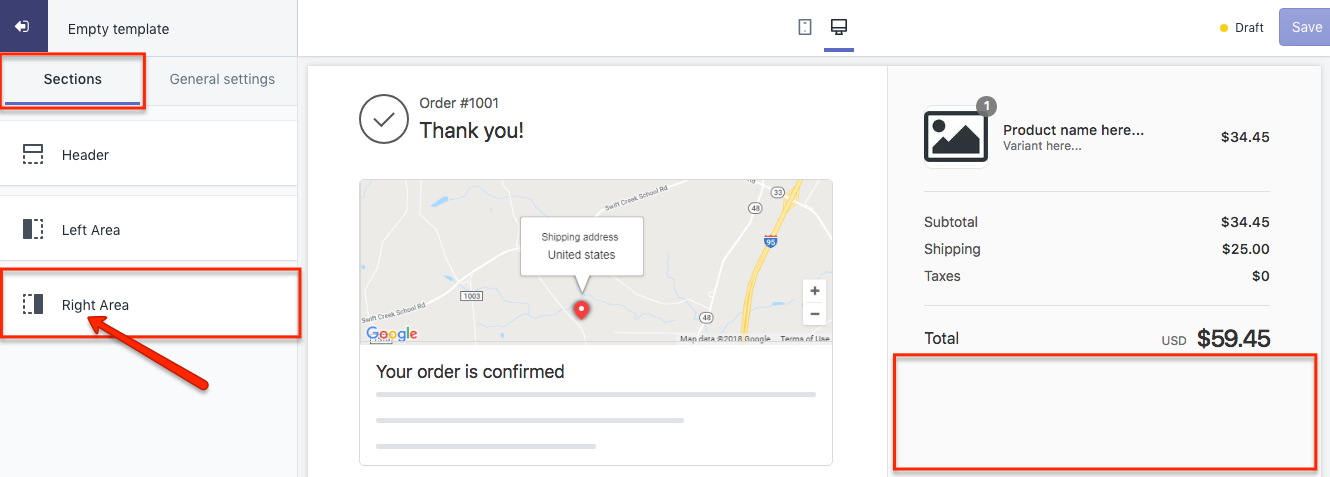
- In the template interface, click on Sections and choose where to place the birthday collection form: in the Header, Left Area, or Right Area.
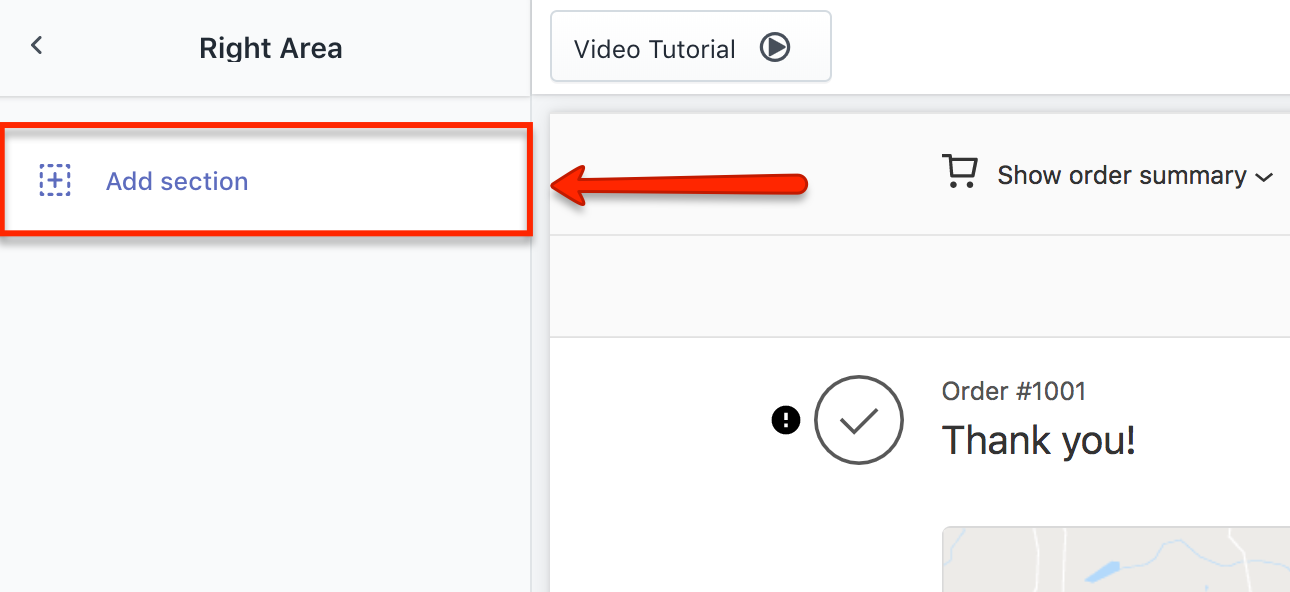
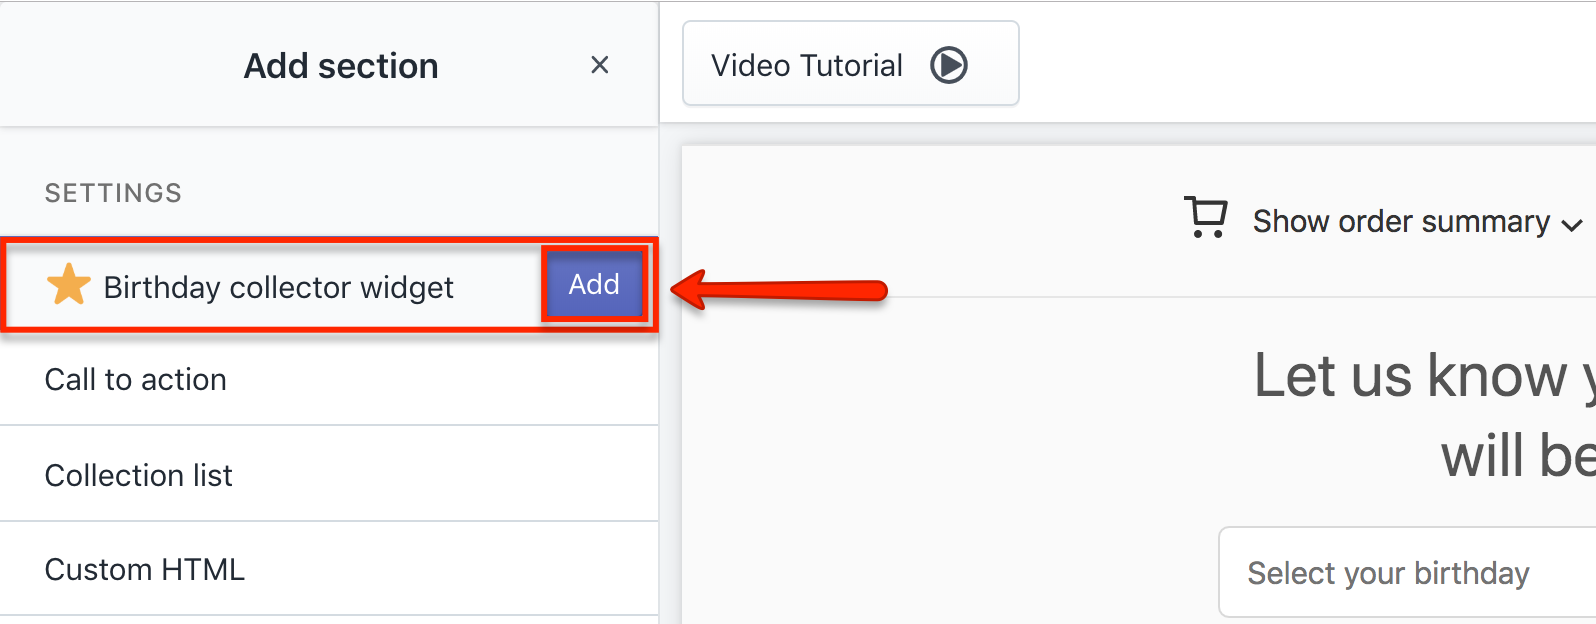
- After you’ve selected the location of your form, click on Add section.
- From the list of sections click on the Add button next to Birthday collector widget to add the widget to your form.
- You will now be able to personalize your birthday collection form by customizing the following fields:
- Free text: Type in a short and catchy text asking customers to submit their birthday so they can receive a special discount
- Date format: Choose the date format that will display (i.e. 28/04/1980 or Apr 28, 1980)
- Placeholder text: Edit the field box text that prompts customers to select their birthday
- Button text: Edit the text of the button customers press to submit their birthday
- Button background color: Choose the background color of the submit button
- Button text color: Choose the text color of the submit button
- Thank you message text: Type in a thank you message that will appear after a customer submits their birthday
- Thank you message text color: Choose the text color of the thank you message
Keep an eye out on the form preview, which updates each time you make a change to the fields above.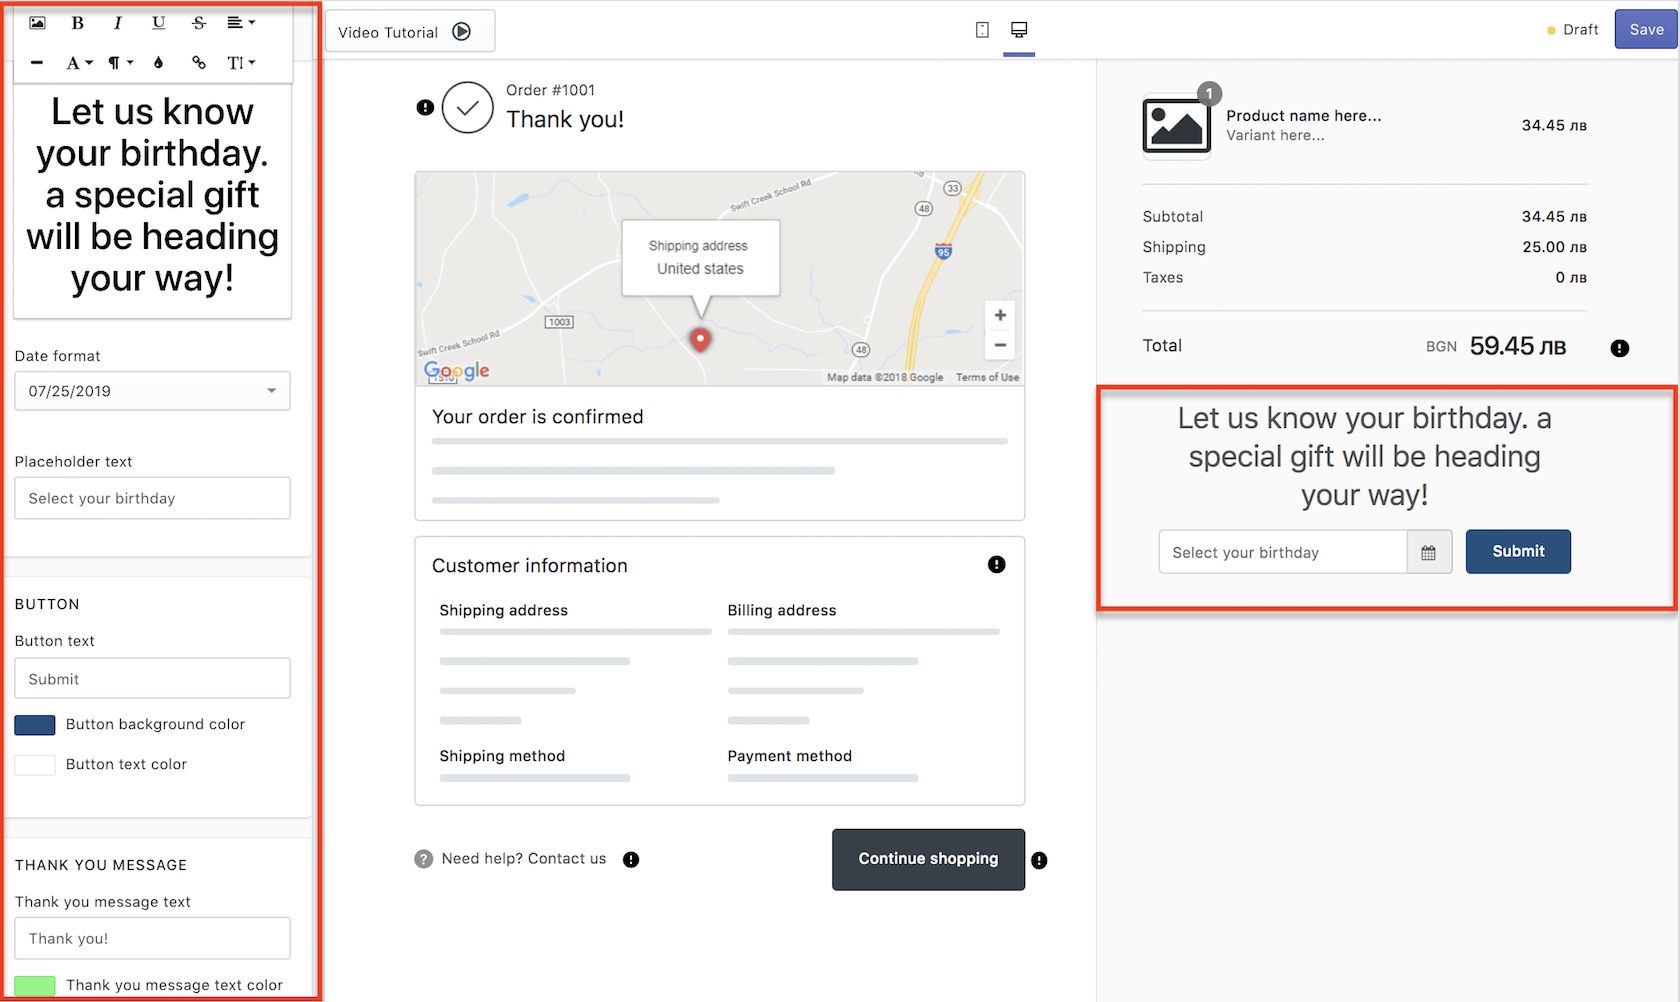
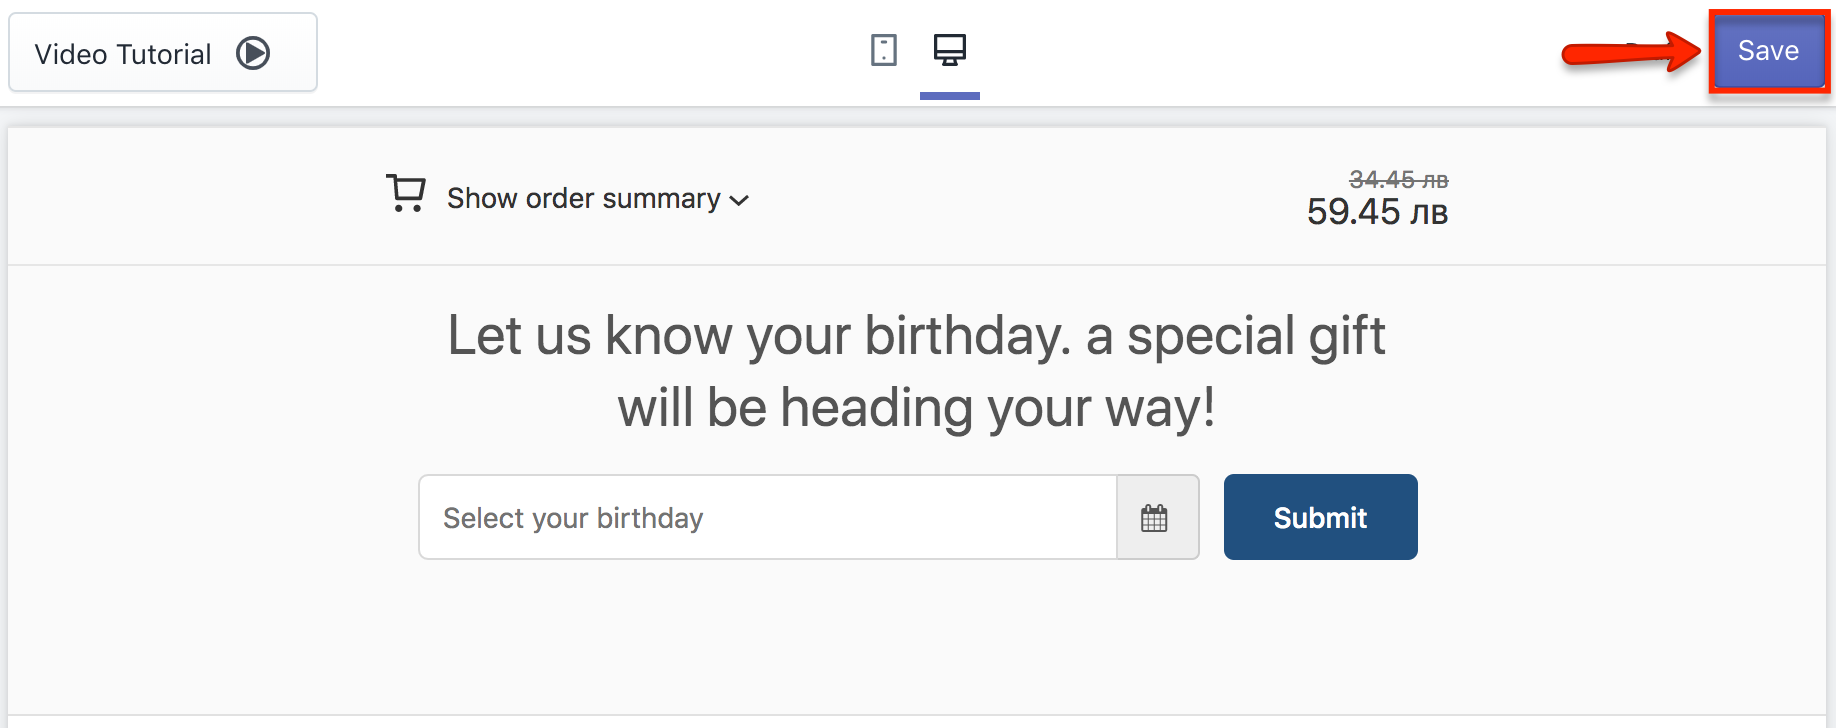
- When you are satisfied with how your birthday form looks, click on the Save button in the upper right corner.
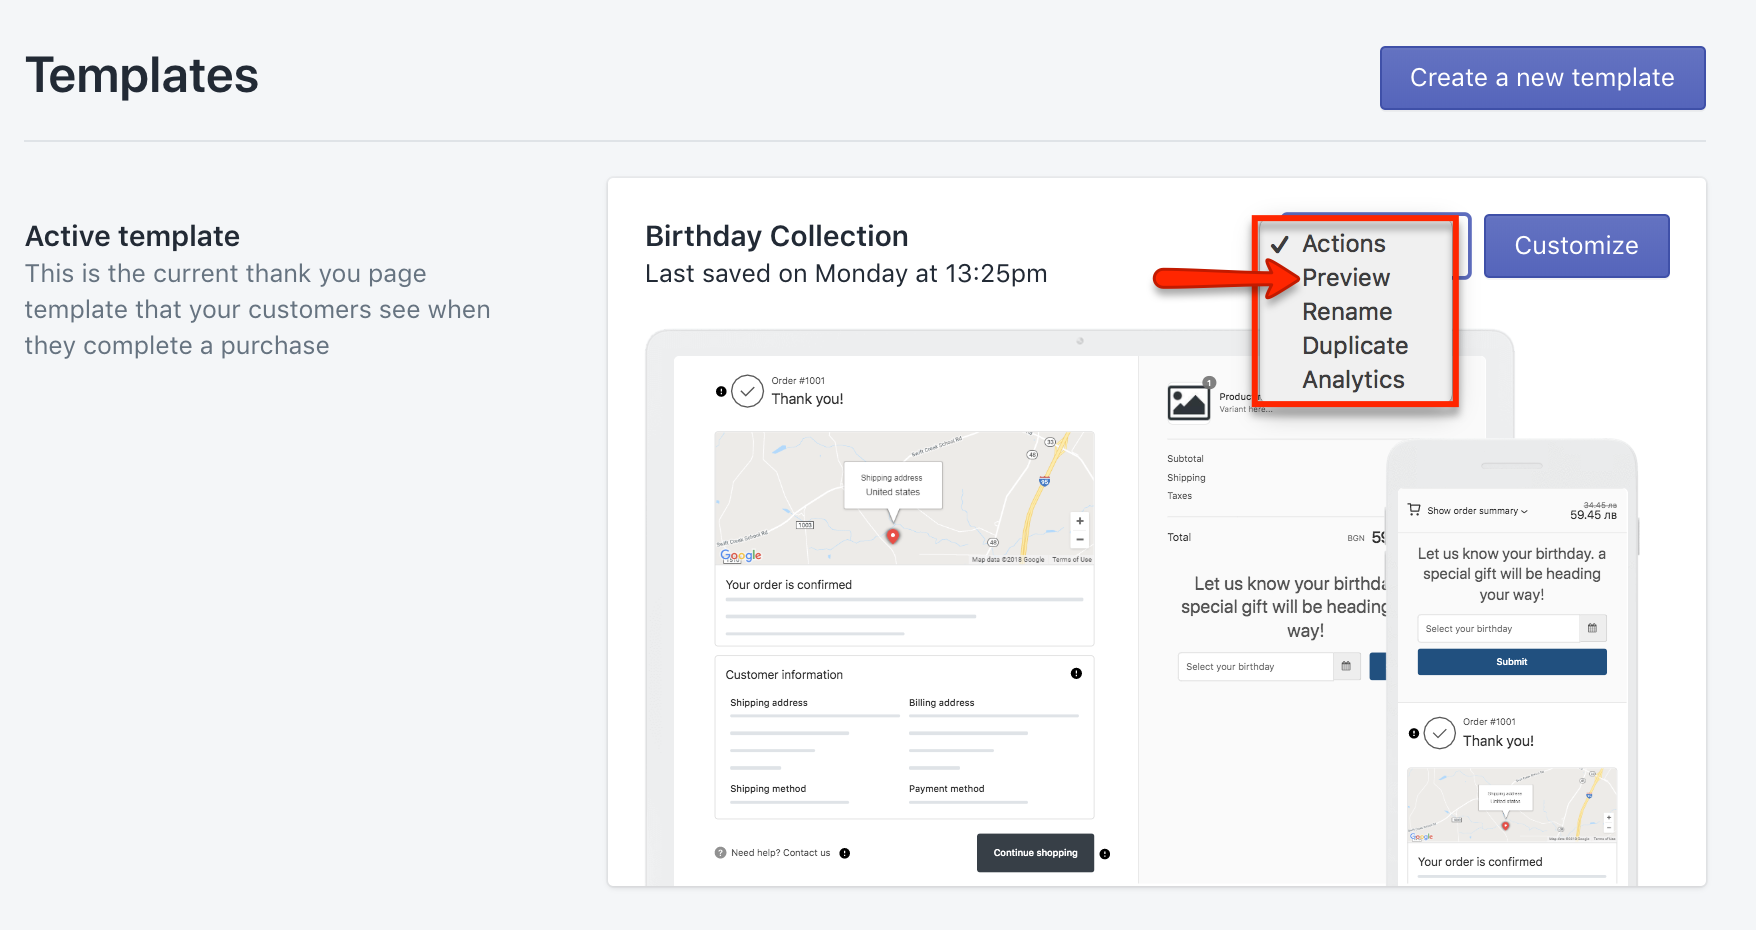
- To preview your birthday form, navigate to the ReConvert dashboard. Under Templates you will see your active template. Click on the Actions dropdown menu, and select Preview.


Important settings
Before you launch your first birthday automation, make sure the following important settings are configured.
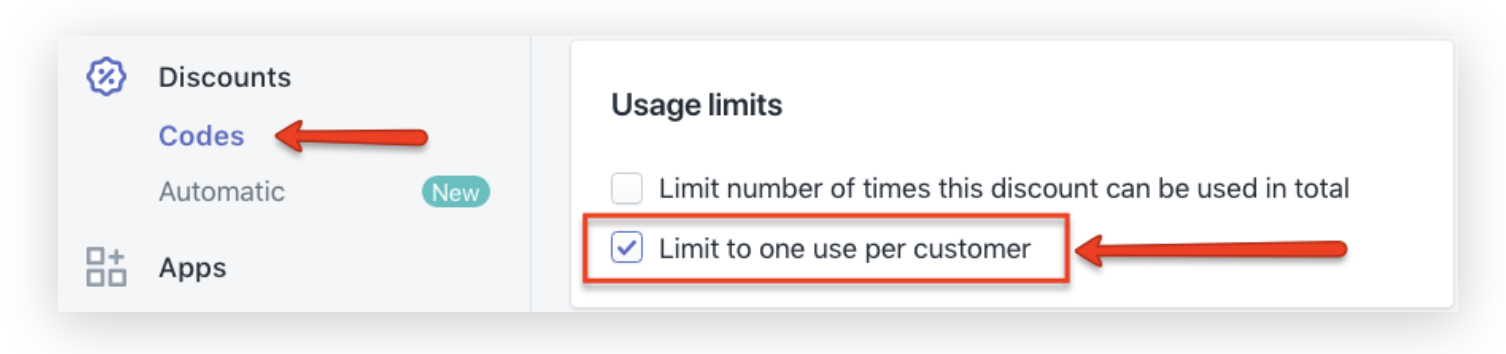
- From the Shopify main menu under Discounts, click on Codes and check the box Limit to one use per customer. This limits the discount use to only once on the customer’s birthday.
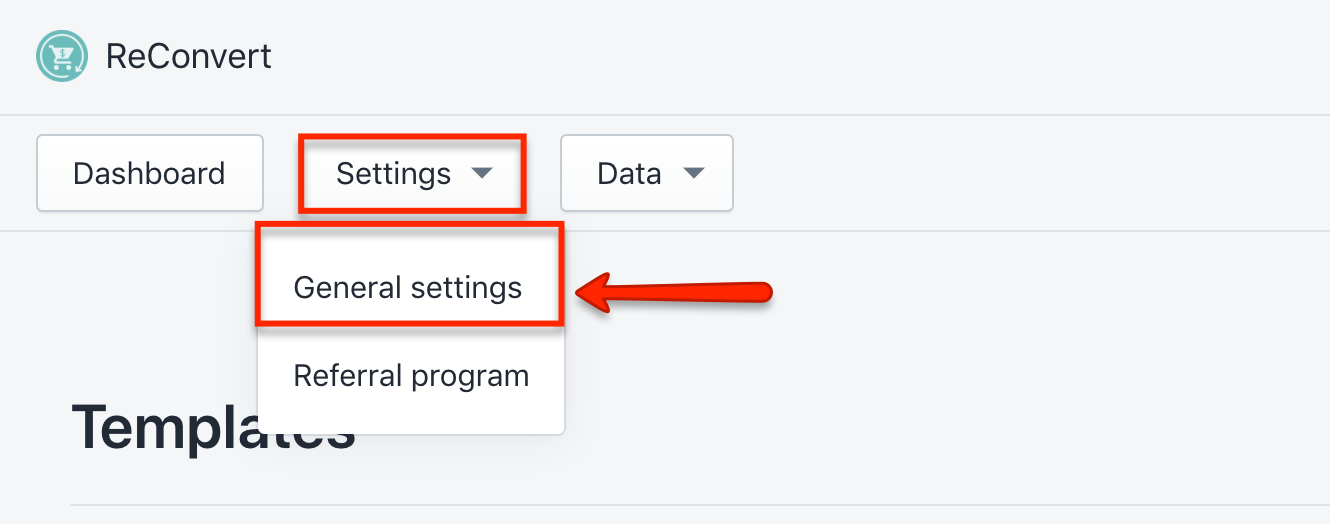
- Inside your Shopify account, click on Apps and select ReConvert. From there, click on Settings and then General settings.
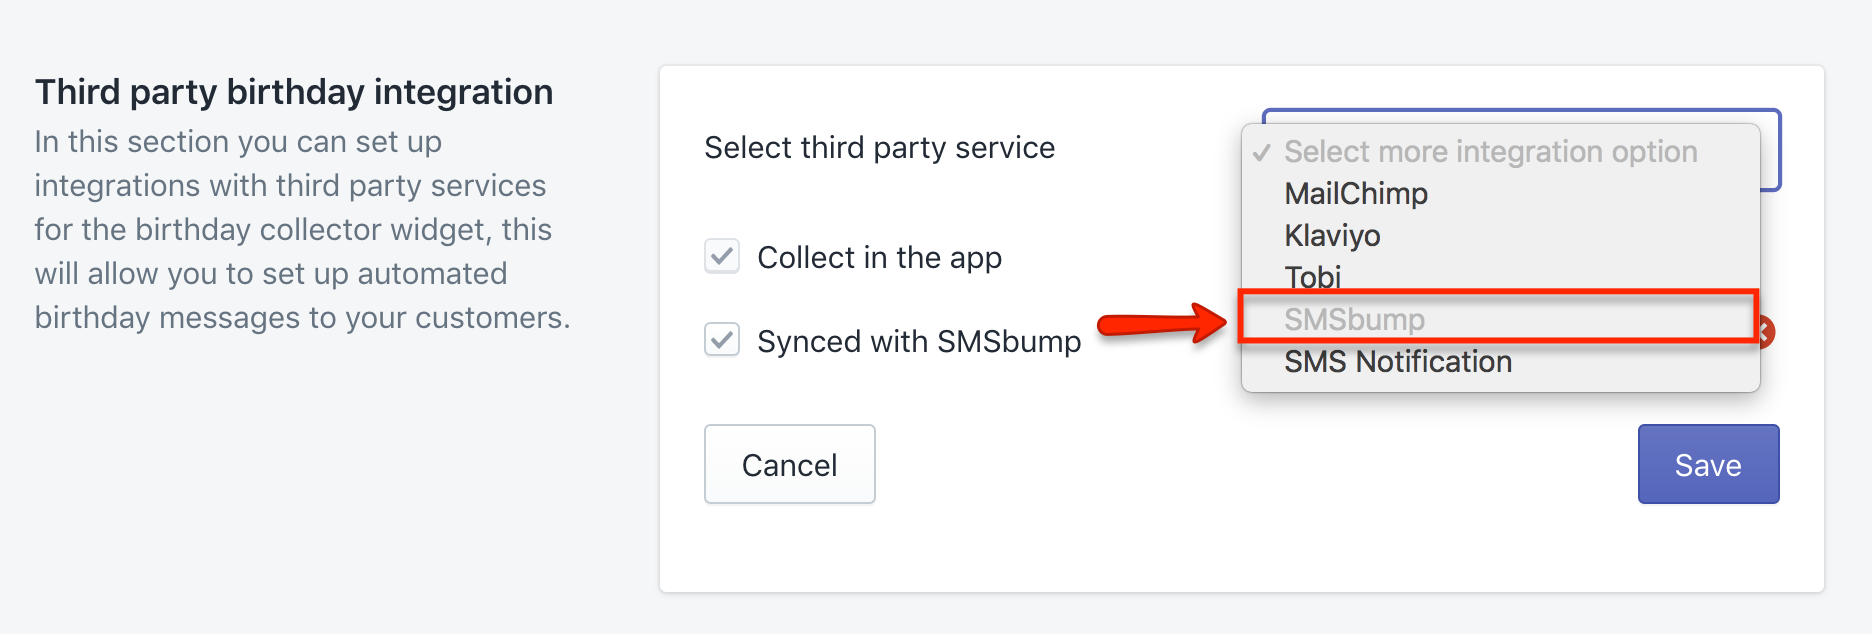
- Make sure that SMSBump is selected under Select third party service and both checkboxes, Collect in the app and Synced with SMSBump are checked. Click on Save.


How to send a birthday automation
- After setting up your birthday collection form, two birthday event automations with an Integrations tag will automatically appear: Birthday Event 1 day before birthday and Birthday Event on birthday.
Head over to Automations from the SMSBump menu and select edit under the Actions column.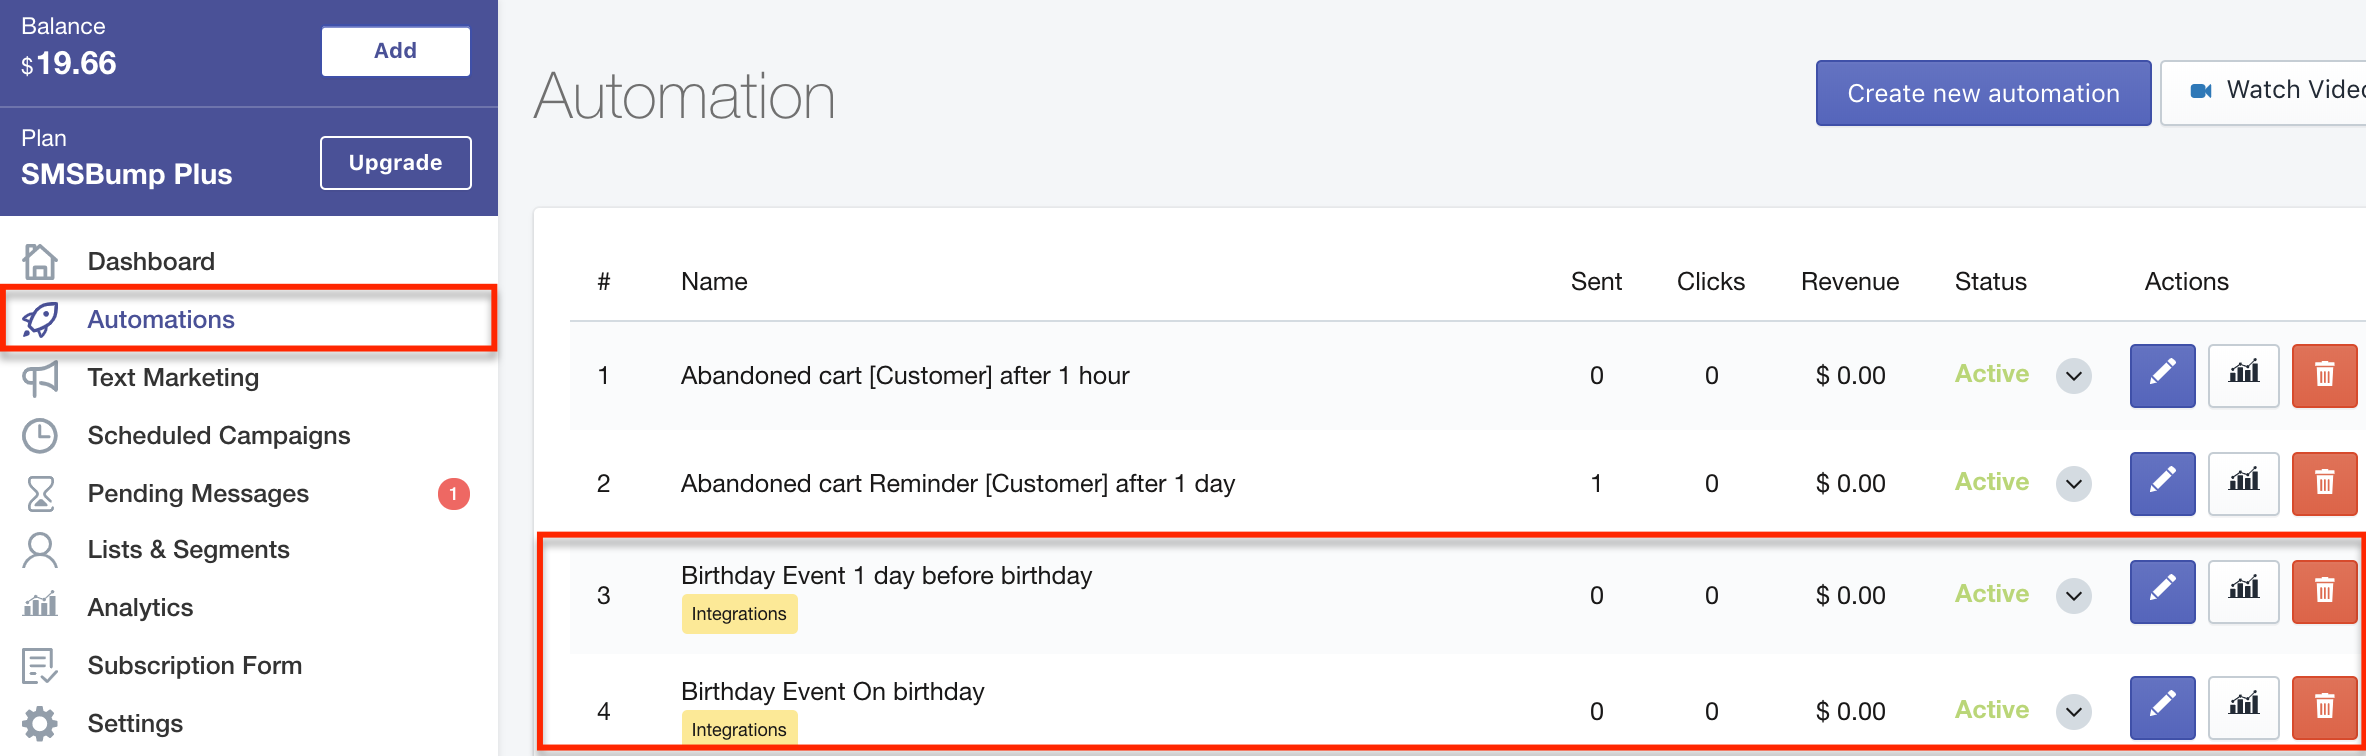
- You will now able to edit the following automation fields:
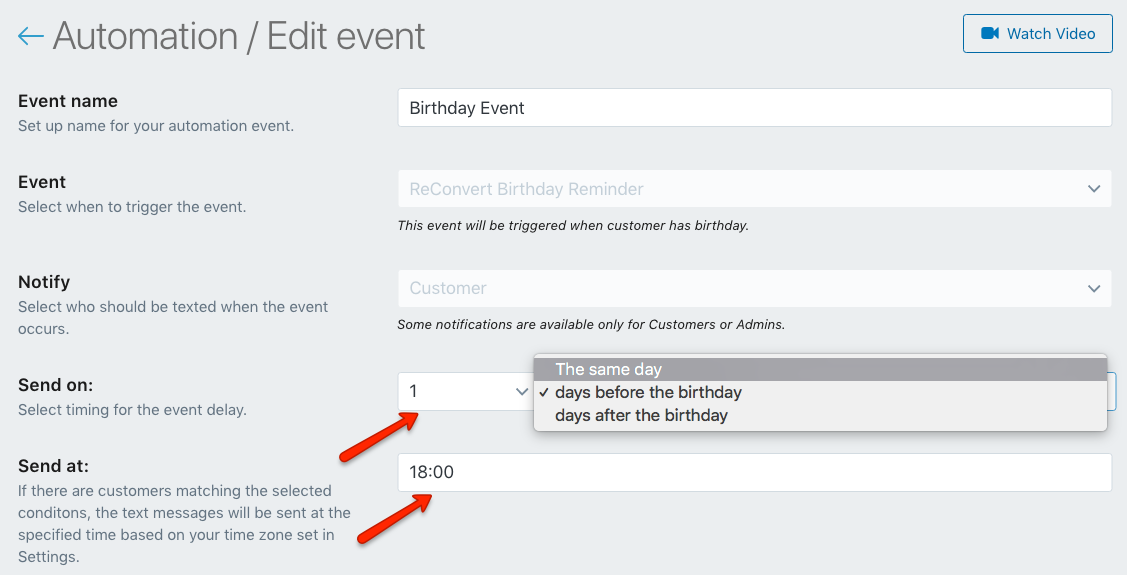
- Event name: Give your automation event a new name
- Send on: Choose whether the birthday automation will be sent the same day, a specific # of days before the birthday, or a specific # of days after the birthday
- Send at: Specify the exact time the automation will be sent to customers based on your timezone set in Settings
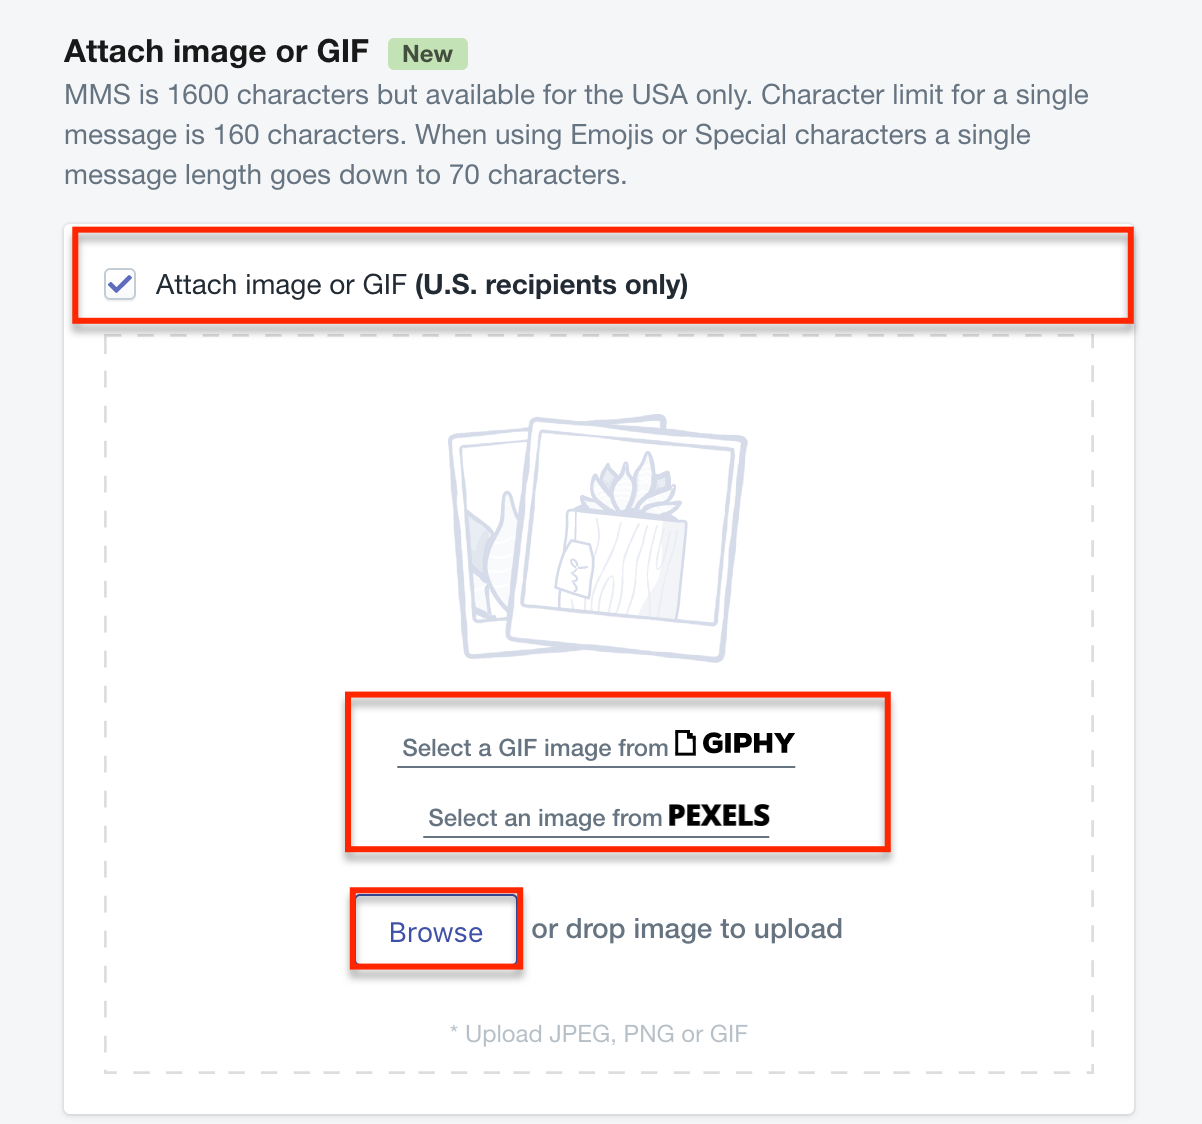
- If your customers are located in the U.S. you can attach an image or GIF. Select a GIF from GIPHY, an image from Pexels, or browse for an image from your own device.Important:Supported formats are JPEG, PNG or GIF. Keep in mind that an MMS is 1600 characters.
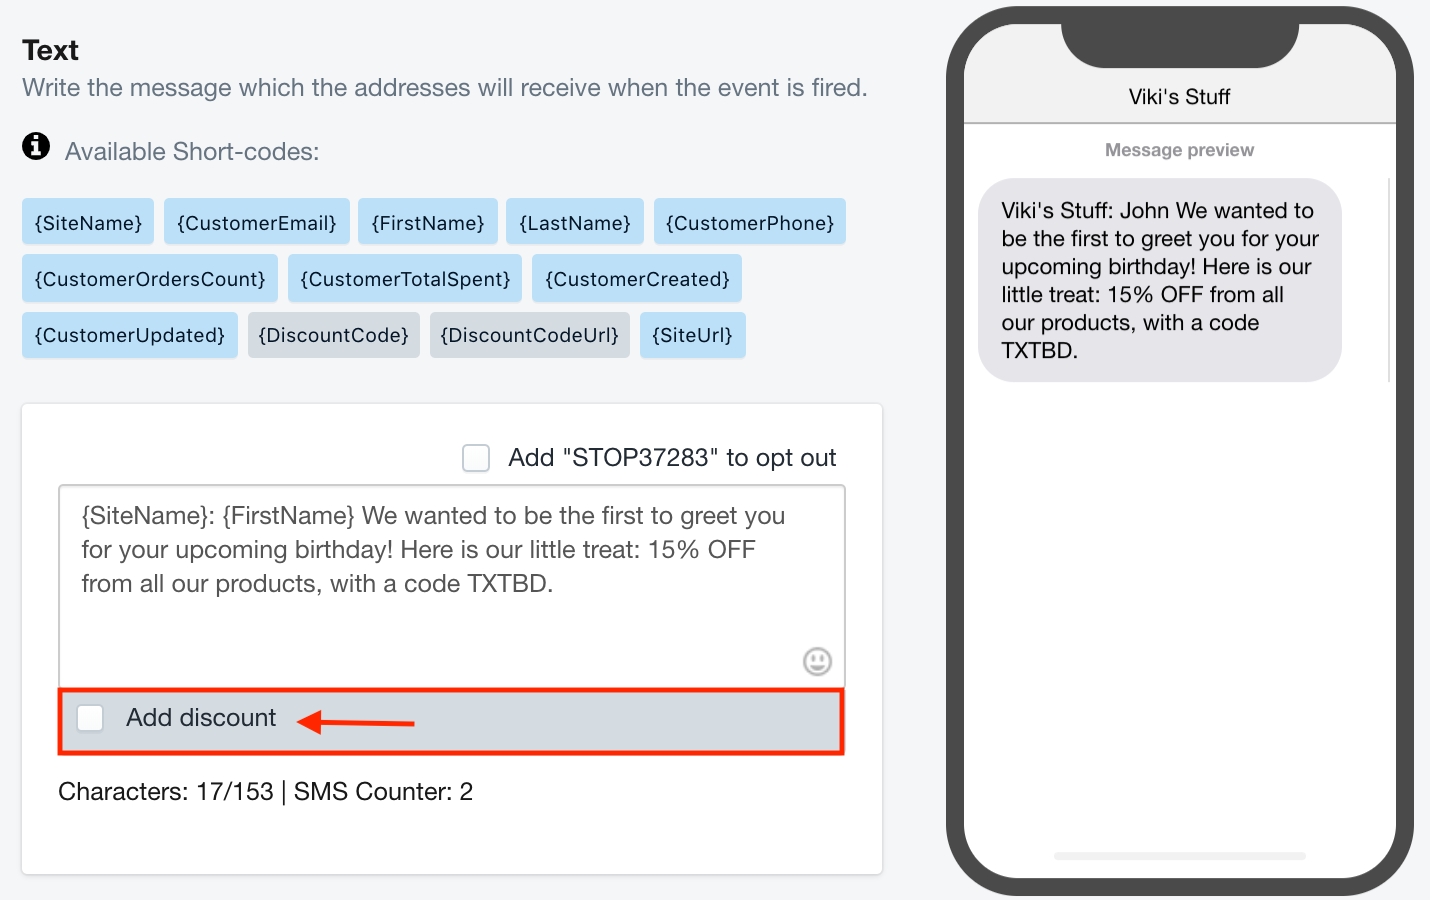
- Personalize the birthday message customers will receive with a thoughtful wish and a generous discount. Select add discount to apply the discount code in the message.Important:Use only the short codes made available. Copy and pasting others will not work.
- First, decide whether you prefer to add a unique code per client or same discount for all clients. Using the same code for all clients will give them a percentage off all items in your store.
If you choose to add a unique code, you have the following discount-type options:- Fixed amount: A fixed amount deducted from the order price.
- Percentage: Specify a percentage deducted from the order price.
- Free shipping: Give your customer free shipping on their order.
Enter the discount value and make sure the embed the discount code in a link is selected. Click on add discount code.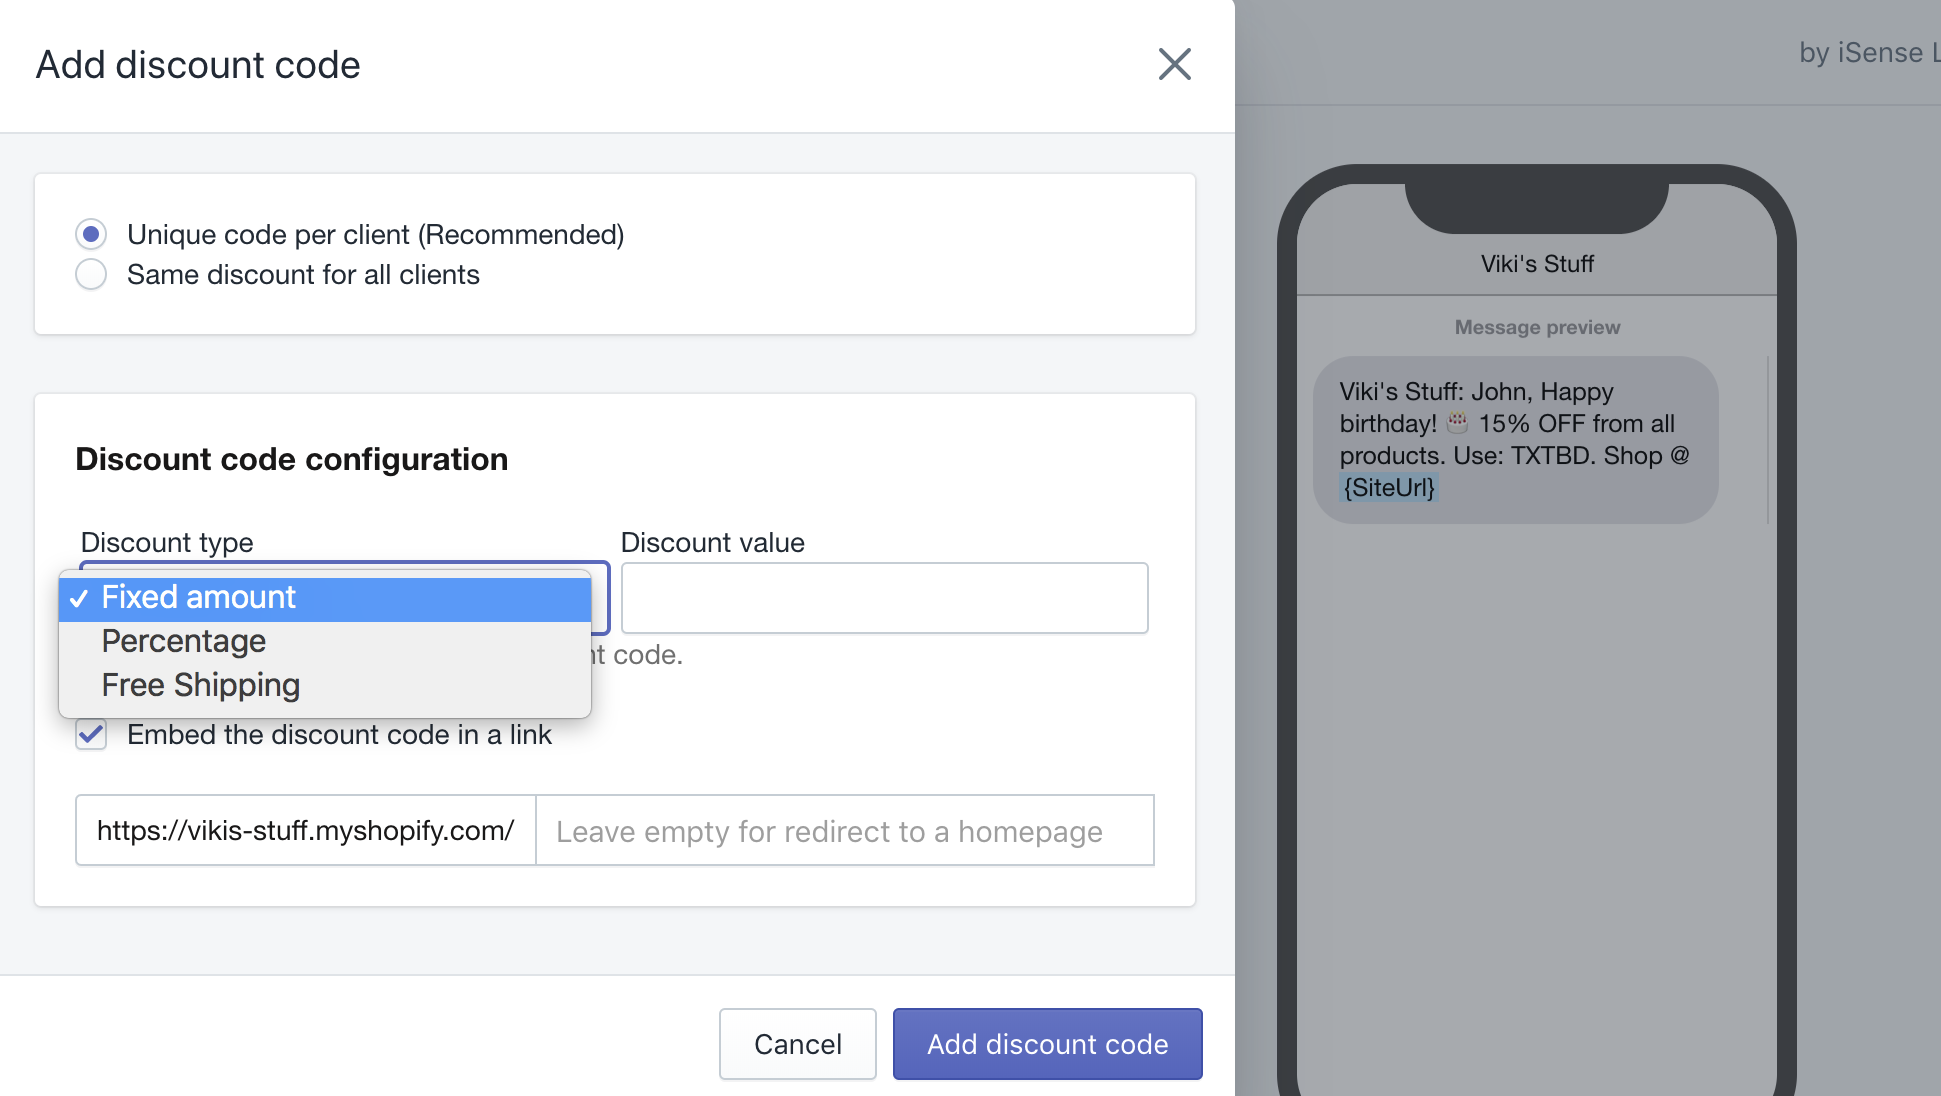
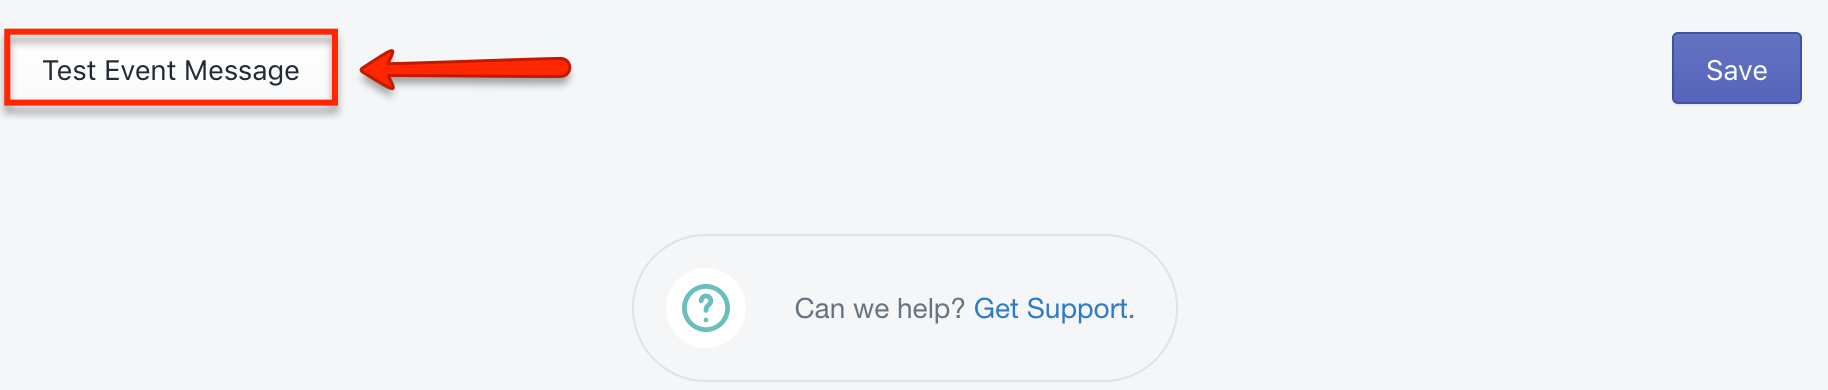
- Click on test event message to send yourself the SMS automation, and make sure everything looks good. Important: Short-codes will appear in raw format. They will show their dynamic data once the automation is launched and sent out to customers.
- Select your number from the dropdown list or click on add more test numbers to send the message to another phone. Click on OK to send the test message.
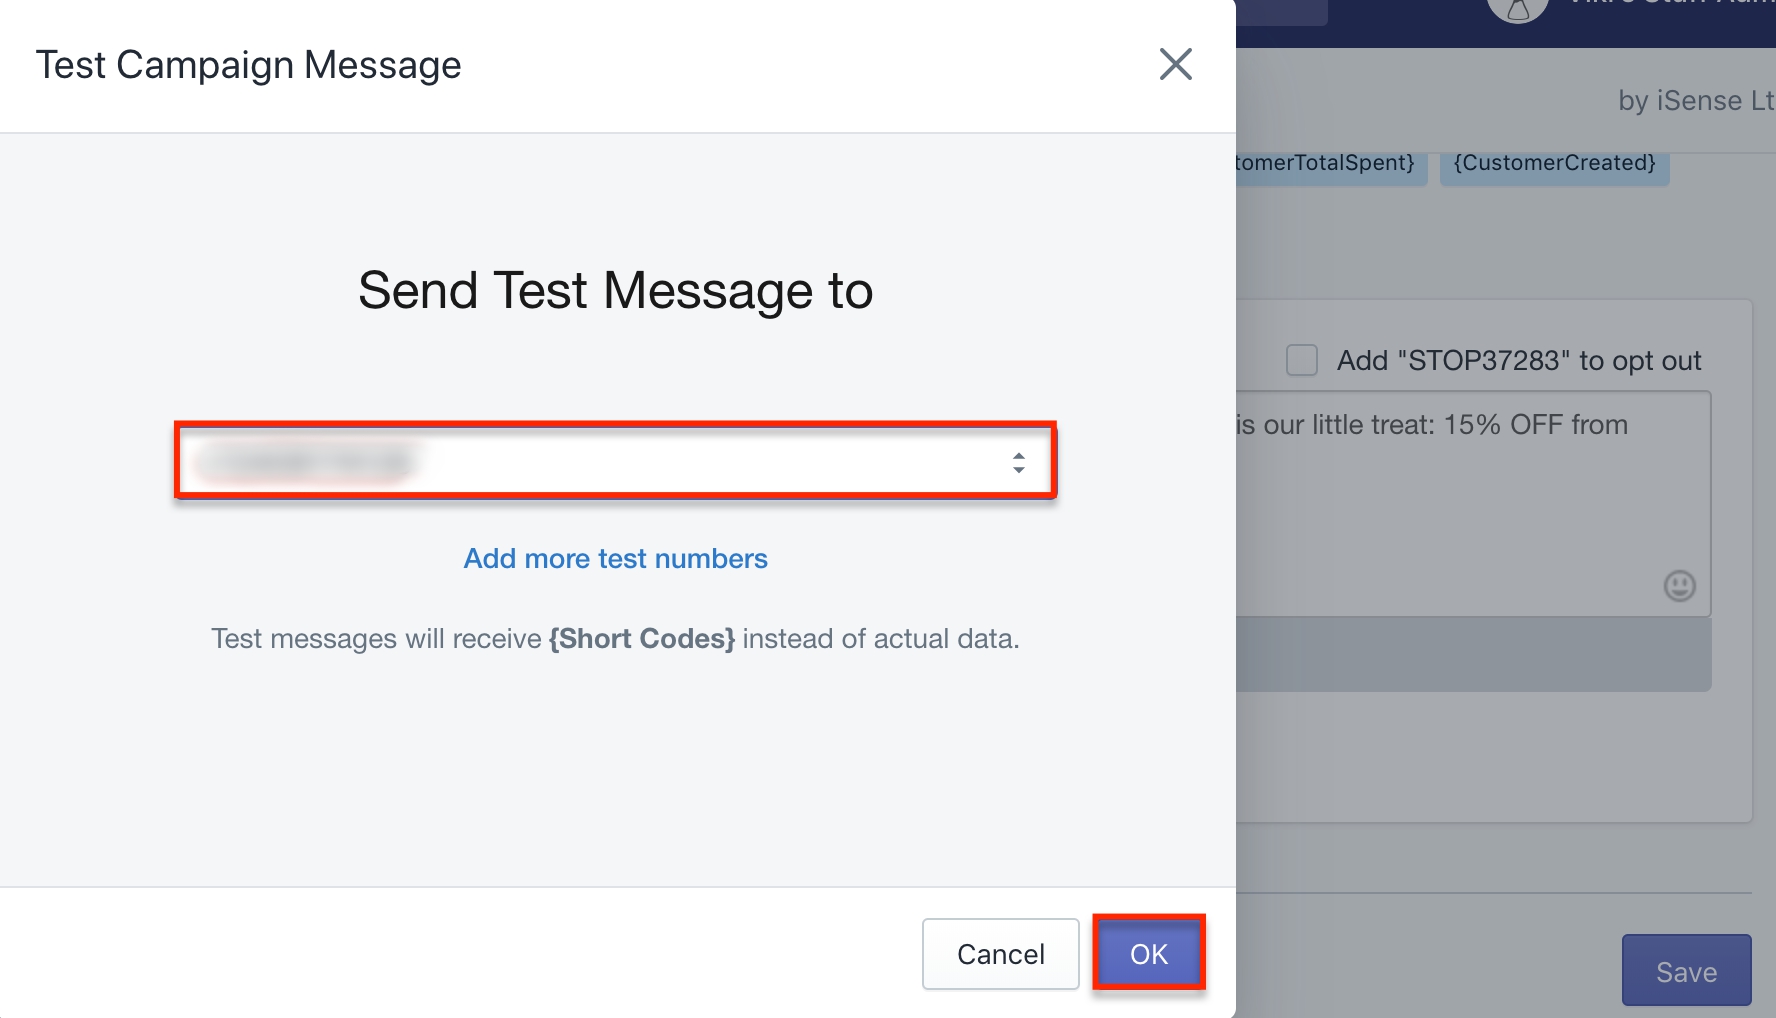
- If you are happy with how the test message looks, click on Save. Congrats, your birthday automation is now launched!


Was this article helpful?